Setting up the Chart of Accounts (COA) in ERPNext can be done in several ways. The first method is using the default configuration when setting up ERPNext, and the second is by importing.
When you set up ERPNext for the first time, you have the option to use the standard Chart of Accounts provided by the system. This default Chart of Accounts is typically sufficient for running small to medium-sized business operations, meaning you only need to add a few custom accounts as needed.

After completing the ERPNext setup using the provided COA, you can view the generated COA for your Company by navigating to the Chart of Accounts menu. To add a new account, click the “+ New” button and fill in the required fields as follows:

New Account Name: The name of the account you want to add.
Account Number: The account code if you want to add specific account numbering (Optional).
Is Group: If checked, this will create an account group. An account group is not a direct account, but merely a folder or marker for grouping accounts. You must create non-group accounts to use them in actual transactions.
Account Type: Select the specific type of the account
Currency: The currency used for the account.
Once the fields are filled, click the Create New button, and the new account will be created.

To edit an account, select the account you wish to modify. Then, click the Action button and select ‘Update Account Name / Number’ to change the account’s name and number


If you already have a custom COA template for your company, you can use the Import feature to set up the COA quickly.
Navigate to the Chart of Accounts Importer menu. Then, select your Company. (Note: You can only perform this import for a Company that does not have any existing transactions). Click Download Template to get the import template file.
Select the file type (Excel / CSV) and choose Sample Template to get an example of the account template, making it easier for you to follow the correct COA format.am membuat format COA


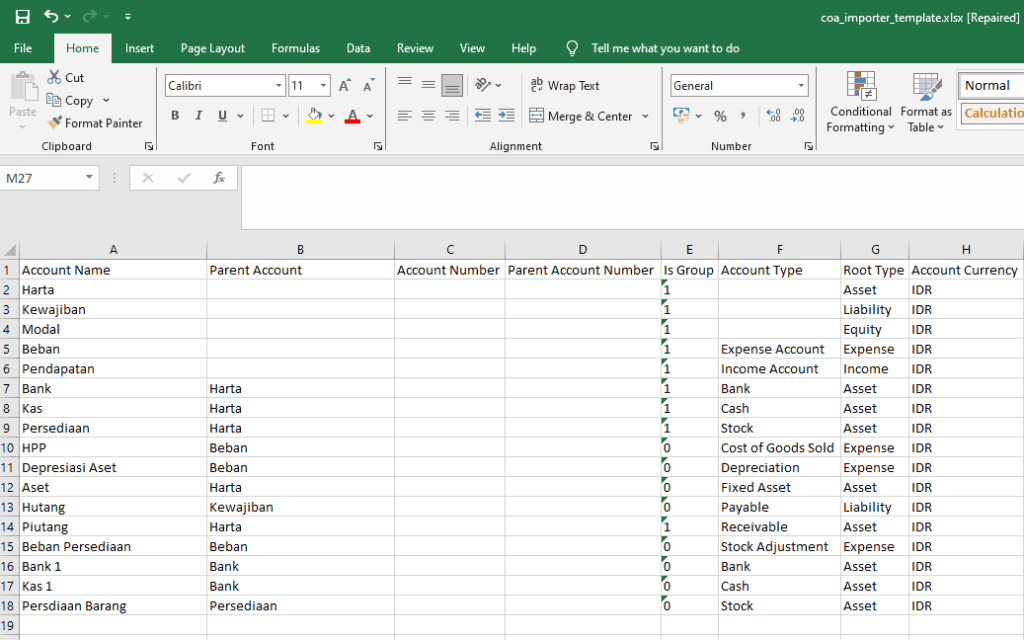
Once you have finished editing the COA in the template, you can upload the file and click the Import button

After importing, you can view the newly imported COA in the Chart of Accounts menu. The system will now reflect your new COA structure
