When Apache Hop 2.19 shipped, the release itself was big news, 337 issues closed, a plugin Marketplace, a native Spark engine. But we flagged something else as the bigger story for team deployments: a full security layer was on the way for Hop Web, the browser version of the Hop GUI.
That security layer is here. It is available now in the newest Hop Web release builds, and it will be officially released as part of Hop 2.20. The short version: Hop Web went from having no login at all to offering four authentication modes, role-based access control, and a dedicated Security tab in the Configuration perspective where admins manage everything without touching a config file.
Why this matters
Hop Web gives your team the full Hop GUI in a browser. Until now it shipped completely open, anyone who could reach the server could open every project, edit every pipeline, and install plugins. If you wanted login, you had to hand-configure the underlying Tomcat server yourself, and even then Hop had no concept of roles inside the UI.
The new layer fixes both problems, with two parts:
- Authentication handles who can get in, with four modes to choose from.
- Authorization handles what each person can do once inside, through roles that Hop enforces across the whole UI, menus, toolbars, dialogs, keyboard shortcuts, even what you can drag on the canvas.
The four authentication modes
You pick one of these in the Security tab (walkthrough below). Think of them as four levels of effort, from nothing to full enterprise login:
- NONE is open access, the historical default. No login page, no restrictions, exactly how Hop Web behaved before. Fine for a personal container on your laptop, wrong for anything shared.
- BASIC is Hop-managed login. Hop Web itself shows a sign-in page and checks usernames and passwords against its own user list. You create and manage users from the UI. This is the right choice for a small team without a central identity provider.
- EXTERNAL hands authentication to something you already run. Your servlet container or a reverse proxy in front of Hop Web handles the login, and Hop trusts the user it receives. This is the natural fit when your organization already authenticates people through LDAP or an existing gateway.
- OAUTH2 is single sign-on. Users click one button, get sent to your identity provider, and come back logged in. Works with Keycloak, Microsoft Entra ID, Google, Okta, or any provider that speaks OpenID Connect. We cover it in detail in the SSO section below.
Four roles, enforced everywhere
Once someone is logged in, Hop maps them to one or more of four built-in roles:
| Hop role | What that person can do |
|---|---|
| Admin | Everything, including managing security settings and installing marketplace plugins |
| User (developer) | Create, edit, save, delete and run pipelines and workflows, and manage metadata. No security settings, no plugin installs |
| Operator | View and run only. Cannot save, edit or delete anything |
| Read-only | View only. Cannot even execute |
The enforcement is thorough. Menus, toolbar buttons, right-click actions and keyboard shortcuts are all gated, so a Read-only user simply does not see Save or Run. If someone triggers an action they lack rights for, they get an Access denied dialog. Better still, dialogs open in read-only mode for users without edit rights: fields cannot be changed and OK is disabled, which is a nice way to let junior staff look inside a transform configuration without risking accidental changes. The pipeline and workflow canvas blocks dragging, deleting and reconnecting for them too.
Two small touches show the thought that went into this:
- The toolbar shows who is signed in, next to a Log off button.
- Admins get a session privilege dropdown that lets them temporarily step down to Operator or Read-only without logging out, handy for checking what a colleague actually sees. You can only step down, never up, so there is no way to escalate your own rights.
The new Security tab
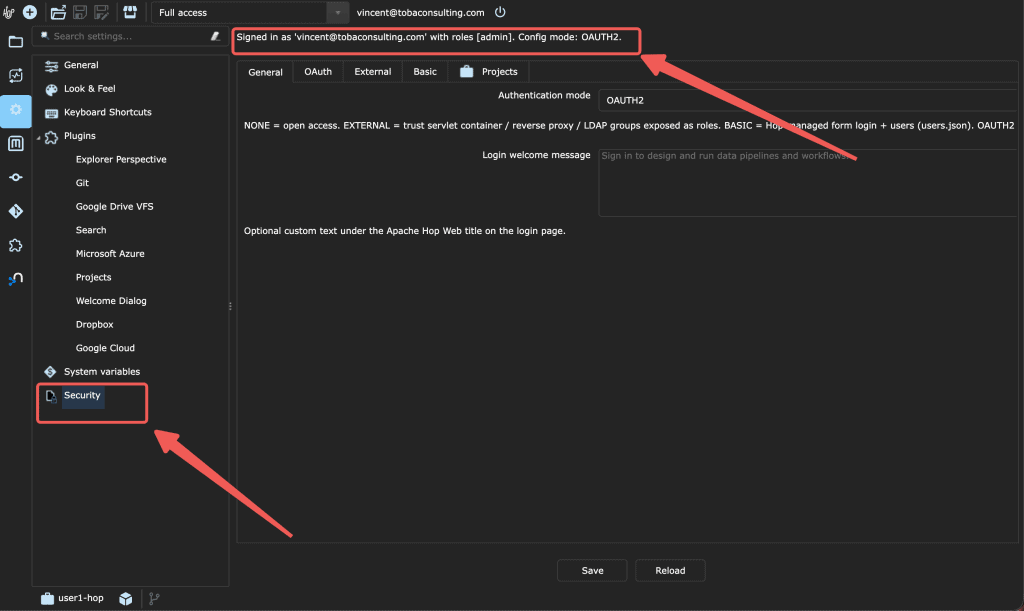
This is the heart of the update for UI users. Open the Configuration perspective in Hop Web and you will find a Security tab. It appears only for admins, and only in Hop Web, never in the desktop GUI.
At the top, a status line tells you where you stand: either “Session is unrestricted (no AuthN)” when authentication is off, or “Signed in as ‘name’ with roles […]”. Under it sit four to five sub-tabs, plus Save and Reload buttons. Save writes your settings, Reload discards edits and re-reads from disk. Here is what each sub-tab contains.
General
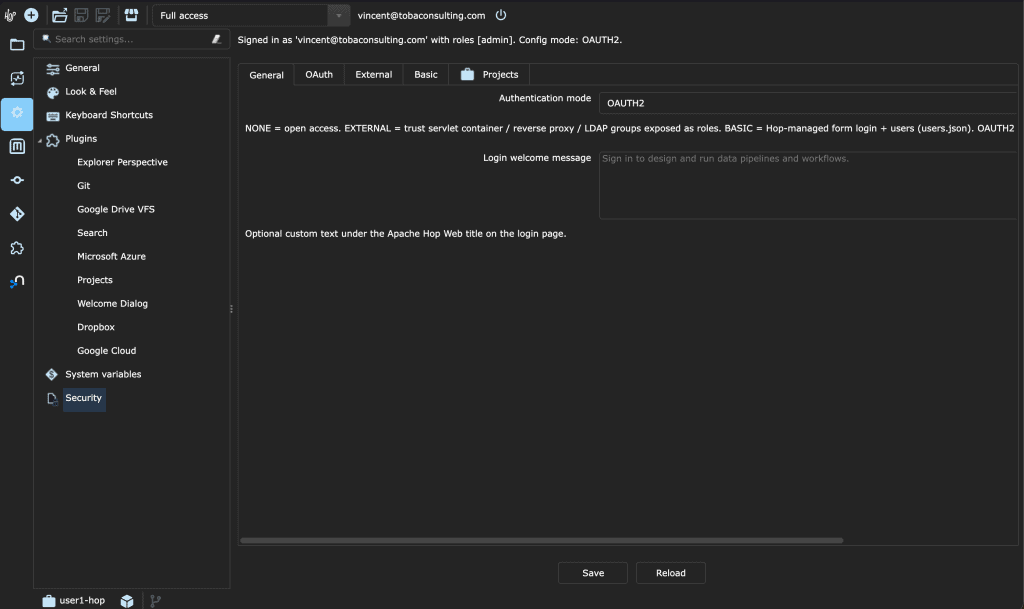
Where you switch the whole thing on.
| Field | What it does |
|---|---|
| Authentication mode | The dropdown with the four modes: NONE, EXTERNAL, BASIC, OAUTH2 |
| Login welcome message | Custom text shown under the “Apache Hop Web” title on the sign-in page (BASIC and OAUTH2 only). Leave empty for the default message: “Sign in to design and run data pipelines and workflows.” |
Basic
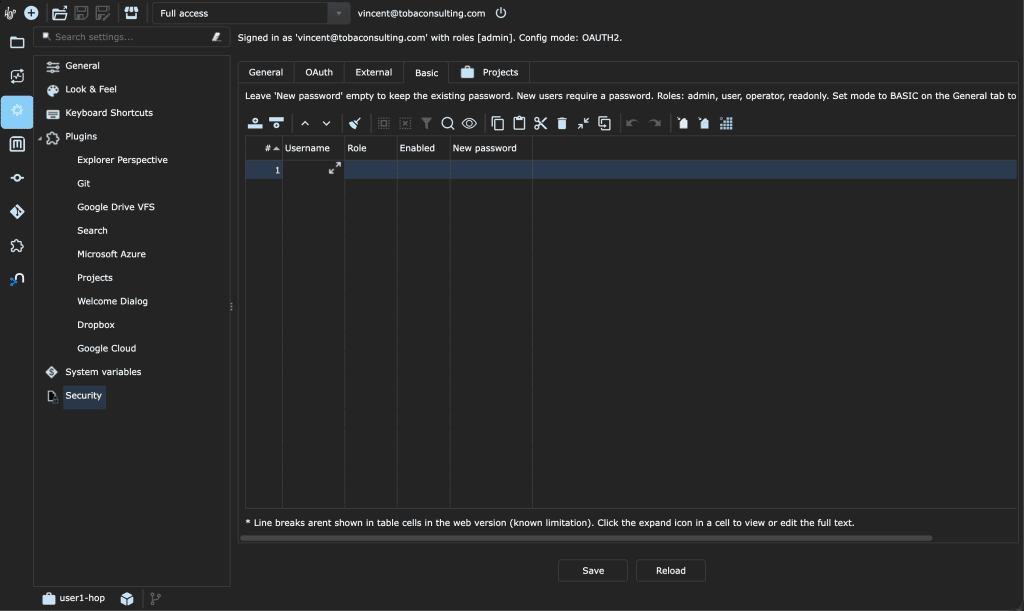
The user management screen, used when mode is BASIC. One Users table with a row per person:
| Field | What it does |
|---|---|
| Username | The login name |
| Role | Dropdown: admin, user, operator or readonly. A blank role defaults to user |
| Enabled | Y/N switch. Disabled accounts always fail login, useful for suspending someone without deleting their row |
| New password | Type to set or replace a password. Leave it empty to keep the existing one. Passwords are stored one-way hashed, never in plain text |
Adding a teammate is one row: username, role, password, Save. You need at least one user for BASIC mode to work.
One chicken-and-egg problem to know about: when authentication first turns on, the user list is empty and nobody can log in to the UI that manages users. You bootstrap the first admin with an environment variable before the container starts, HOP_WEB_ADMIN_USER and HOP_WEB_ADMIN_PASSWORD. For a quick local demo there is also HOP_WEB_SEED_DEMO_USERS=true, which creates four sample accounts, admin, developer, operator and viewer, each with their own username as password.
External
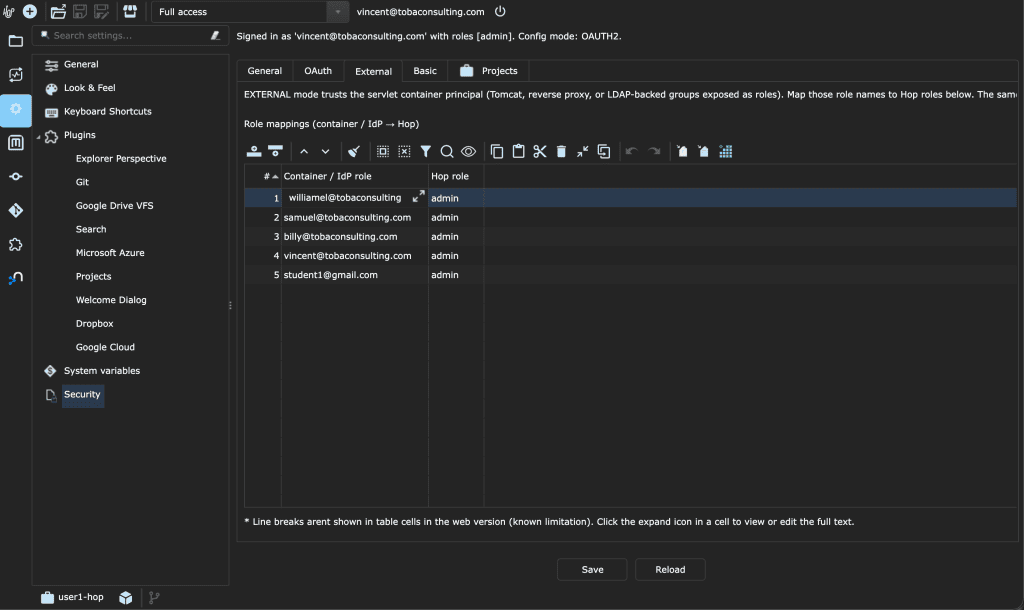
A single mapping table, Role mappings (container / IdP → Hop), with two columns:
| Field | What it does |
|---|---|
| Container / IdP role | The role or group name as it arrives from your container, reverse proxy, LDAP, or identity provider. Free text, you type what your side sends |
| Hop role | Dropdown: admin, user, operator, readonly. What that name translates to inside Hop |
For example, if your LDAP sends the group data-engineers, add a row mapping it to user, and everyone in that group becomes a developer in Hop Web. Empty rows are ignored, and if the table is empty Hop falls back to sensible built-in name matching. This tab matters for EXTERNAL mode and for SSO, since both need somewhere to translate “group name from the outside world” into “Hop role”.
OAuth
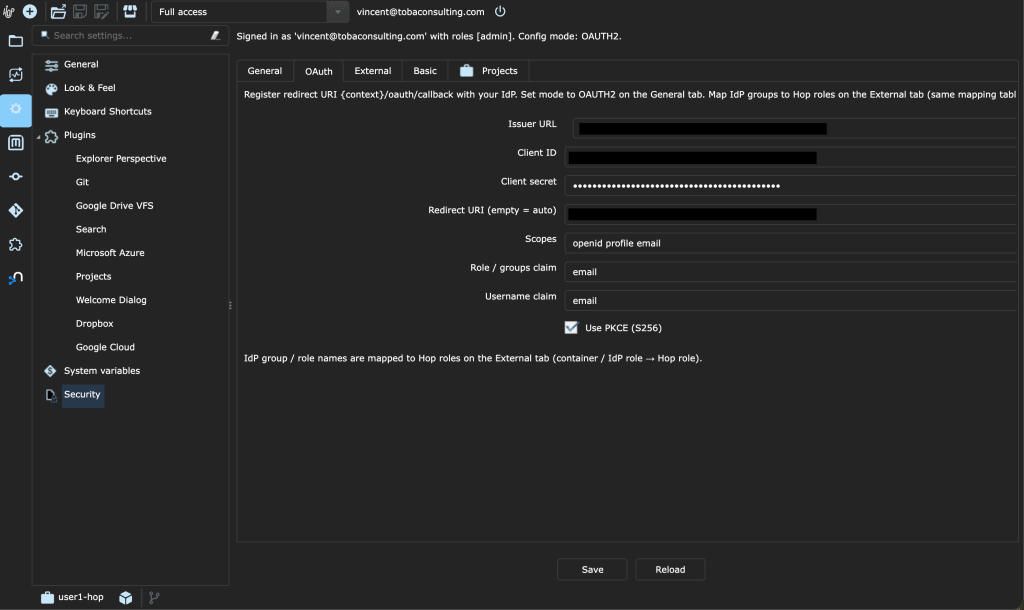
The single sign-on settings, used when mode is OAUTH2. Each field is short:
| Field | What it does |
|---|---|
| Issuer URL | Your identity provider’s address, for example https://keycloak.example/realms/hop. Hop fetches everything else it needs from here automatically |
| Client ID | The client you registered at the identity provider |
| Client secret | The client’s secret, shown masked. Public clients using PKCE can leave it empty |
| Redirect URI | Where the provider sends users back. Leave empty and Hop builds it automatically, you just register that address with the provider |
| Scopes | What Hop asks to know about the user. The default, openid profile email, works for most providers |
| Role / groups claim | Which field in the login token lists the user’s groups, this is what feeds the External mapping table. Default is groups |
| Username claim | Which field holds the username. Default is preferred_username, for Google use email |
| Use PKCE (S256) | An extra security layer on the login exchange, on by default. Leave it on |
Projects
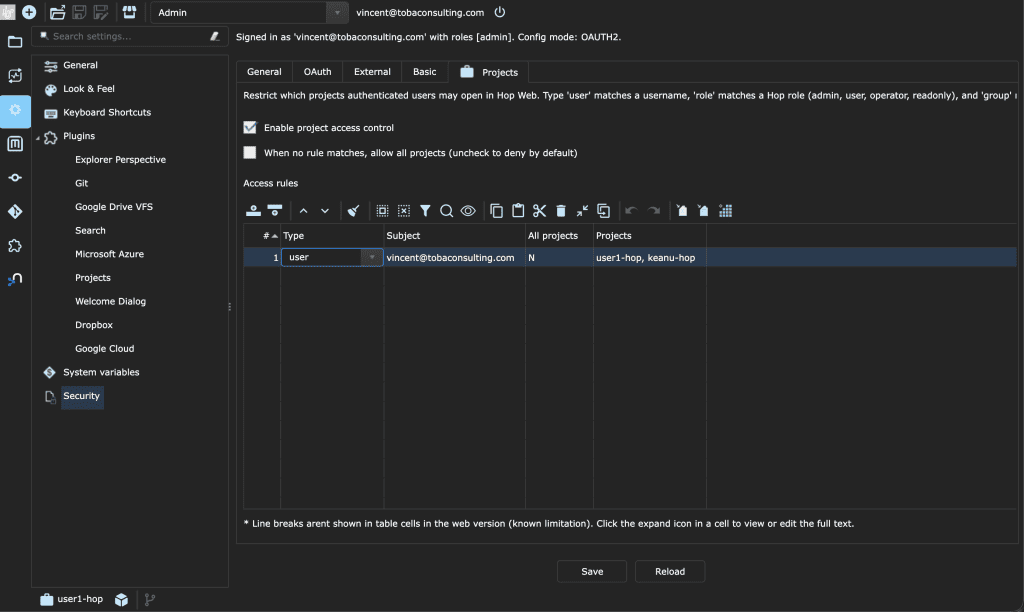
The finest-grained control of all, deciding who may open which projects:
| Field | What it does |
|---|---|
| Enable project access control | Master switch. Off by default, everyone sees all projects. Desktop sessions are never filtered |
| When no rule matches, allow all projects | Checked (default), anyone not covered by a rule sees everything. Unchecked, only admins keep full access and everyone else sees only what a rule grants |
| Rules → Type | What a rule matches on: user (a username), role (a Hop role), or group (a group from your container, LDAP or identity provider) |
| Rules → Subject | The actual username, role or group name |
| Rules → All projects | Y means this person or group may open every registered project |
| Rules → Projects | A comma-separated list of project names, used when All projects is N |
One note on Save: after saving, people who are already logged in keep their old roles until they log in again. And if you use Hop’s own BASIC login, do not also turn on login at the Tomcat level, pick one path.
Wrap-up
Hop Web has gone from the weakest link in enterprise Hop adoption to a platform you can actually run for a mixed team. Four login modes cover everything from a laptop demo to Keycloak-backed SSO, four roles are enforced down to individual dialogs and canvas operations, and the new Security tab means admins manage all of it from the same UI their team designs pipelines in.
If you want a feel for it before the official 2.20 release, run the one-line Docker command above and spend ten minutes logging in as each demo user. The role differences are immediately visible. The full documentation lives in the Hop Web manual.