After understanding Apache Airflow in the previous article, we will now install Airflow on our local system or personal computers. Therefore, there are a few things to prepare so we can use Airflow smoothly. Since there are many ways to install Airflow, whether on a Linux or Debian server, or on a local system like Windows, we will focus more on installing it on our own devices using Docker and Visual Studio Code (VSC).

Docker
Docker Engine is a platform for automating application deployment using containers. Its core components include the Docker Daemon (which manages containers), the Docker Client (the primary tool for interaction), and Docker images (standalone packages containing the runtime, code, and dependencies). Docker simplifies deployment across various environments, while additional tools like Docker Compose and Swarm enable the management and clustering of multi-container applications.
In Docker, a container is a portable and lightweight package that includes all the necessary components to run an application, ensuring consistency across different environments. Containers are isolated, efficient, and built from Docker images, functioning as self-contained units for easy deployment and execution. They promote portability, efficiency, and consistency in software development and deployment.
To install Docker, you can click the link below:


Visual Studio Code (VS Code) is a free, lightweight source code editor developed by Microsoft. It supports multiple programming languages and includes smart features such as Git integration, a debugger, and an integrated terminal. With its extensive extension support, VS Code delivers a powerful and customizable coding experience. We will need VSC because we will be creating Python files to build DAGs, which will contain the scripts required to run the Airflow processes.
To install Visual Studio Code, you can click the link below:
Installing Apache Airflow on Docker
- Create a folder with any name, for example, “Materials”, in any directory, such as in your Documents or local disk.
- Inside this folder, download this file from the Airflow website: https://airflow.apache.org/docs/apache-airflow/2.7.3/docker-compose.yaml (or an older version like 2.5.2).
- Right-click and save it as
docker-compose.yaml.txt, then remove the.txtextension and save it asdocker-compose.yaml. - Open your terminal or Command Prompt (CMD) and navigate to
Documents/Materialsor the location where thedocker-compose.yamlfile is saved. - Open Visual Studio Code by typing the command:
code . - It will then open up and look something like this:
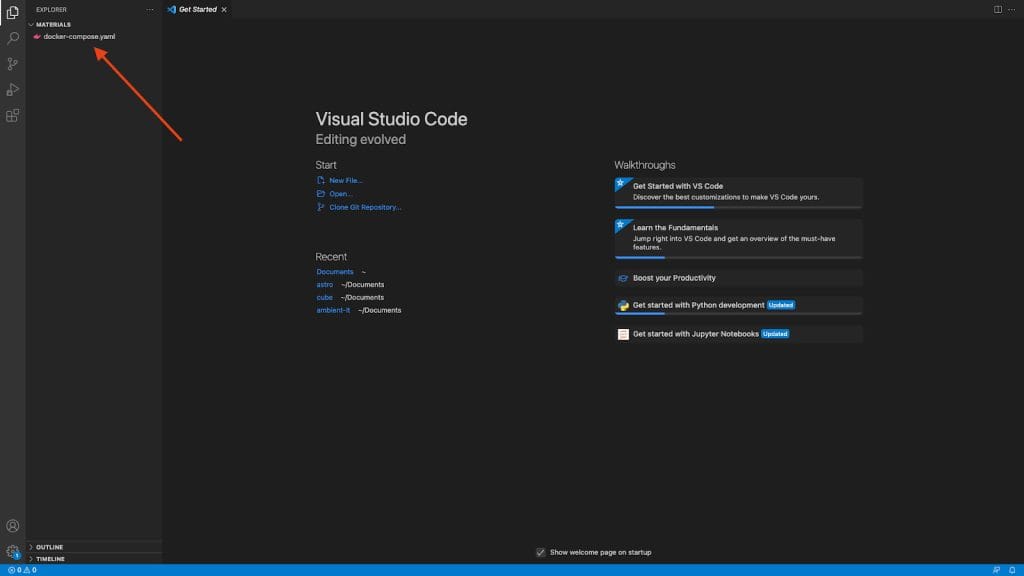
- Right-click inside VS Code below the
docker-composefile and create a new file named.env. - Inside the file, type or paste the following (you can refer to the Airflow documentation for other image versions):
- AIRFLOW_IMAGE_NAME=apache/airflow:2.7.3
- AIRFLOW_UID=50000
- Save the file.
- Open the terminal in VS Code from the top menu bar on the left.

- In the terminal, type
docker-compose up -dand press Enter.

- Wait for Docker to download all the necessary files for the Airflow installation:diperlukan untuk instalasi Airflow:
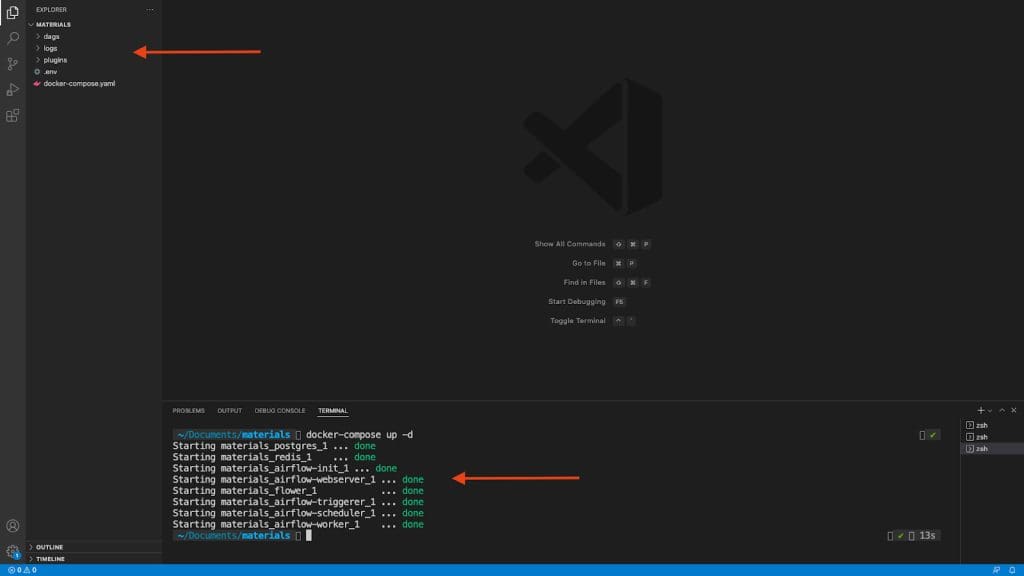
After it finishes, you can verify the installation by navigating to localhost:8080 in your browser (e.g., Chrome) to see if Airflow is running.